Targeting Digital Signage Content with Drupal, Xibo and RSS

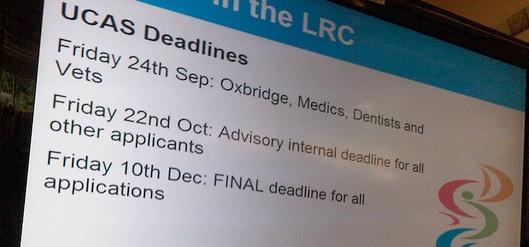
a Xibo signage screen

A Xibo signage screen

One of the most popular articles on my blog is about Xibo – an open source digital signage system. I first setup our Xibo installation a couple of years ago; it hasn’t been developed heavily, but serves a useful function for informing our students and staff. In response to a request from Ben in response to my ‘Getting the message out with Xibo‘ post, here’s an overview of how I paired Xibo with the RSS aggregation and publishing functions of Drupal.

RSS in Drupal

Drupal offers as standard two very useful RSS functions; one for aggregating content, the other for publishing. Let’s focus on the publishing first.

Working with the default content type (that of a story), Drupal by default offers you an RSS feed of published content; just go to the root page of your Drupal installation to see the list of current stories and look for the RSS feed button at the foot of the page. The RSS feed can be customised (number of articles, feed content) by opening the Drupal content management settings and adjusting parameters in the RSS Publishing section. There’s no more configuration necessary.

Filtering RSS feeds with Drupal Taxonomy

We have a number of display screens around campus, each with a slightly different audience. For example, visitors to reception will be interested in different content than our students in the coffee shop. I have configured taxonomy in Drupal, which enables me to deliver targeted RSS feeds to specific displays. A single taxonomy vocabulary is defined, and populated this with multiple terms, each of which describes the location of our displays. For example, these include ‘refectory’, ‘reception’ and ‘staff room’. Users may not enter their own taxonomy terms, and in applying taxonomy, it’s therefore easy to train our users in one simple concept: choose from a defined list of displays which they would like content displayed on. So, for a content item intended to display in the reception area, ‘Reception’ is the taxonomy term selected from the list of available terms in the vocaubulary.

Having configured this, it’s worth heading back to your stream of stories from Drupal; by this point you need to have entered a few stories, then attached some different Taxonomy terms to each. At the root of the Drupal site, you will see all stories – and an RSS feed for the same content. Follow the link to one of your taxonomy terms (click the term itself); your list of stories immediately changes. What you now see is only the articles matching the taxonomy term you just selected. Most usefully for us, this view will be accompanied by an RSS feed – the feed will match the content you are viewing, and we can take this URL for use in Xibo. Your feed URL will look something like this:

<site name>/?q=taxonomy/term/<term ID>/0/feed

Obviously <site name> will be your Drupal root path, and <term ID> is the identity number of the taxonomy term you have selected.

Targeted Content Publishing in Xibo

This part is pretty easy now; we’ve got our filtered RSS feed URL and can paste this into the content for a given display. Just open the content editor, select the area in which you want to publish, and add (or edit) the RSS feed component, pasting the filtered URL we generated in Drupal. Save everything and go check out your Xibo display; after a refresh (which depends upon the rate you have set at both the server and client).

I haven’t mentioned RSS Aggregation here; this is an additional feature of Xibo that should work equally well. Aggretation will simply draw content from external feeds into Drupal on a scheduled basis for re-publishing. I have ambition to do this with content from our virtual learning environment (Moodle). Once you have aggregated the feeds, content can be re-published using the same principle.

If you are using Xibo, I hope you find this useful; it would be great to hear your experiences of using the application alongside Drupal in the comments.

(PS. Don’t forget to check out Ben’s computer repair service!)
A Drupal Story, Part 2

20110613-195513.jpg

In the first post in this series, I explained some of the history of the Alton College web site; a little about our experiences with developing and maintaining a web presence, and how we internded to move forward with the Drupal platform.

Following this began an intense process of evaluation of the current site structure. Or outgoing site had grown very organically with content being channeled to our developer of the time. Surprisingly, this worked reasonably well for a long time. However, once the volume of content reached a certain level, it was evident that we would soon be left with a cumbersome and confusing site.

From the outset, our marketing team have been key to the redevelopment process, contributing valuable design skills and ensuring that the site accurately communicates our message, as laid out in our branding guidelines and corporate strategy.

In order to understand the structure of our outgoing site, we had to map the content – a manual process, since the implementation included no site mapping features. We turned to the web for help and used bubbl.us, a free mind mapping tool to create simple illustration of our content. We we careful not to over-complicate this process by including every last detail, but instead included only significant content. A key feture here was the abity to share our maps among contributors – our marketing team being the most significant of these. Once everything was included in our maps, it was easy to re-model the structure to fit the design brief and to incorporate new content requirements that were emerging from peripheral discussions that were taking place.

We approached a key stage at this point. As the likely structure of our site begwn to emerge, so too did the need to identify a suitable theme for our drupal installation. Drupal uses pre-built themes of varying complexity. Out of the box, themes are relatively straightforward and easy to customise. Look around the Drupal community though, and you will find advanced examples that enable some really exciting things to be delivered.

But let’s not get too carried away by the opportunities provided by themes just yet – there are design considerations to make. Our marketing team and design consultants had produced a layout that would enable two layers of navigation alongside a flexible area of body content, and our chosen theme must accommodate this and other elements of the design brief. I’ll talk more about content arrangement in a future post.

The final choice? Acquia Marina a theme produced by TopNotchThemes. Acquia Marina enabled us to work with some flexible content ‘zones’ and accommodate our navigation requirements – albeit with a little work to achieve this. We coupled the basic theme with the ThemeKey module, which allows for the application of a specific style (or just colour, in our case) based on your location in the web site. We’ve used a number of modules throughout the site to extend functionality – more about these later in the series.

A Drupal Story, Part 1

20110613-195513.jpg

A little over a year ago, a new web site was launched for Alton College. The site had been a year in the making – platform, design and content was all identified as being part of a large redevelopment project.

This is the first of a series of posts documenting our site development journey. In this part: our choice of platform.

If you haven’t already done so, it’s worth reviewing your own website via the Way Back Machine (otherwise known as the Internet Archive). Go back as far as you can – right back to the start of the records. In the case of the Alton College web site, this is February 29 2000. Not a good look, but perhaps about par for the times, certainly among educational organisations who had yet to appreciate the value of a quality website (but then nor had many businesses). You will probably notice a few characteristics that give away the production method – it’s FrontPage, and those buttons are pretty standard and often used features of the application at the time. You can’t really distinguish this business site from those of individual or community sites of the same period, or a few years later.

Fast forward to just three years ago, and we had a great site that was developed and maintained by a very talented developer. But herein lay a problem -we were reliant upon our developer for so many aspects of content production. It wasn’t just the page layout and style that needed a developer hand to make changes, but also to edit the content. In the twilight of the site, a simplified content management system was added, allowing for some text to be edited, however this didn’t enable us to keep as fresh and exciting a site as we would have liked. Time for a radical change.

Between 2000 and 2009 we had learned much; how to (and how not to) go about managing site development, which site features and functions are important to us, and what workflows the site infrastructure must support. A process of evaluation began, and we looked at a number of different products, all of them open source; Mambo, Joomla and Drupal.

Why open source? We already had experience in contributing to the Moodle community, the aforementioned developer had collaboratively contributed to the Chamelion theme and a number of different Moodle features. Open source was also being used to deliver our Individual Learning Plan. You have to invest in open source; it doesn’t come ‘free’, and you should certainly consider contributing something back to the community – whether that be directly in support of the product you happen to be using, or in sharing effective practices with others.

Honestly, there wasn’t much to call between Mambo, Joomla and Drupal; each has their own particular outstanding features. If we had particular needs from certain feature sets, one might have stood out above another, but since our needs were fairly generic, the differences were inconsequential. With this in mind we leaned toward Drupal, having some experience of the platform among our team, and knowing that features like the Content Construction Kit would go a long way to extending site functionality.

In my next post I’ll talk about how we analyzed and re-mapped our outgoing website, and the strategy we began to apply to our content.